
Instructions on how to make artistic 3D jelly at home
How to make 3D jelly as vivid as a picture, stimulating the curiosity of the taste buds is the common feeling of diners when they first encounter it. The art of processing 3D jelly is loved by many people, chosen in the dessert menu because of its light and cool taste, 3D jelly was introduced to Vietnam recently as a work of art on the dining table.
1.Ingredient for making artistic 3D jelly
10g Hoang Yen Hai Phong plastic jelly (1 pack)
1500ml water
250g white sugar
100ml whipping cream
100ml fresh milk
Food coloring (optional)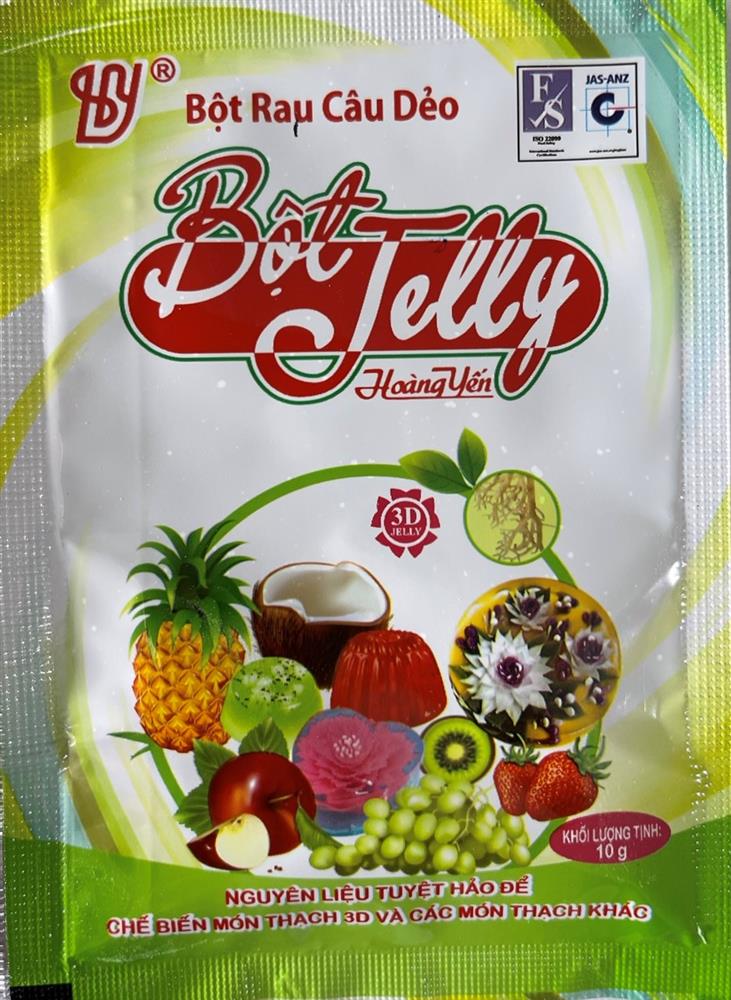
2.How to make artistic 3D jelly
Step 1 Cook the base agar (also known as the base)
Lightly sprinkle 10gr of Hoang Yen Hai Phong jelly powder into the pot containing 1500 ml of water, sprinkle and stir well. Soak for 10 minutes for the flour to rise, bring to a boil, lower the heat, add 250g of sugar and cook until the sugar is completely dissolved, then turn off the heat. Cover the pot, wait for about 2 minutes to dissolve the air bubbles, pour the clear jelly mixture (through a sieve) into the mold to prepare to pump flowers and leave about 300 ml of agar in the pot for the next step. When the jelly in the mold is cooled, put the jelly mold in the refrigerator for about 30 minutes
Note: when cooking jelly: remember to stir well so that the jelly and sugar do not burn at the bottom of the pot.
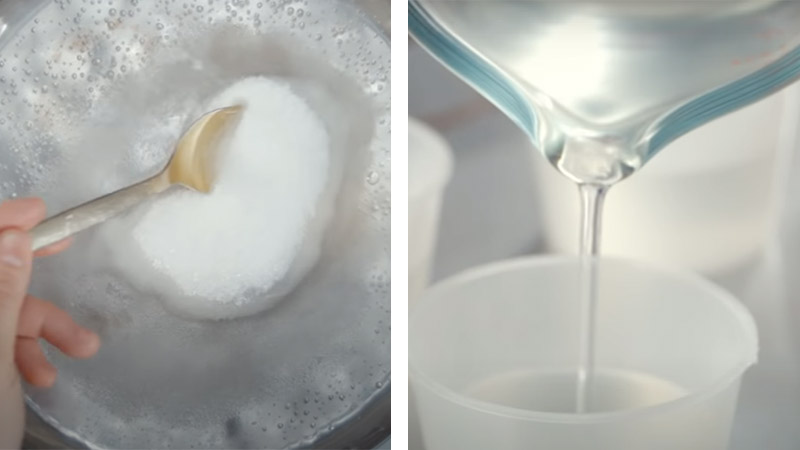
Cook the jelly base mixture and pour it out into the mold
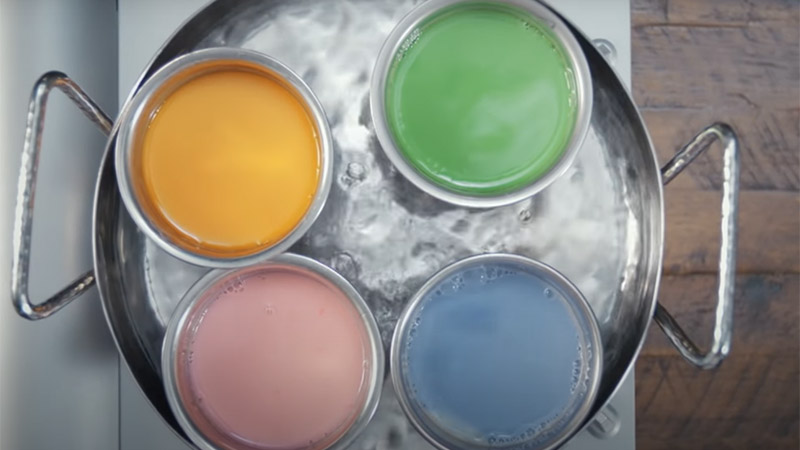
Step 2 Cook the mixed jelly topping
Use 300 ml of jelly remaining in the pot and cook with 100 ml of whipping cream and 100 ml of fresh milk. Put the mixture in different bowls and cook on low heat.
Note: The water bath will help the topping stay liquid, not frozen during the 3D decoration process.
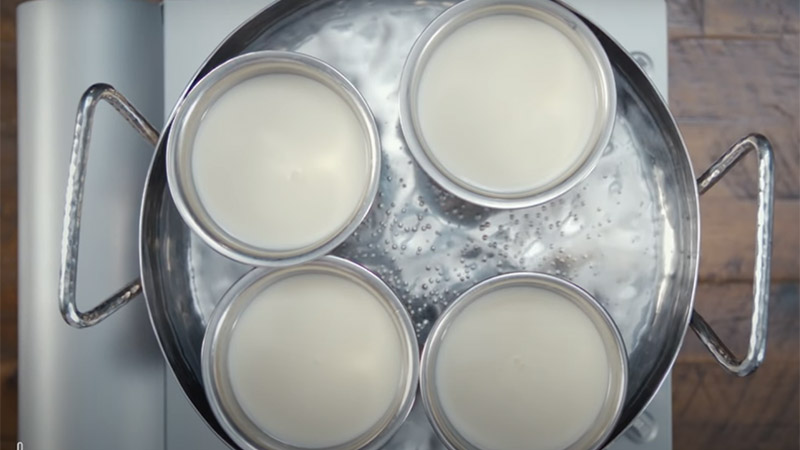
How to cook the jelly topping in water How to cook the jelly topping in water?
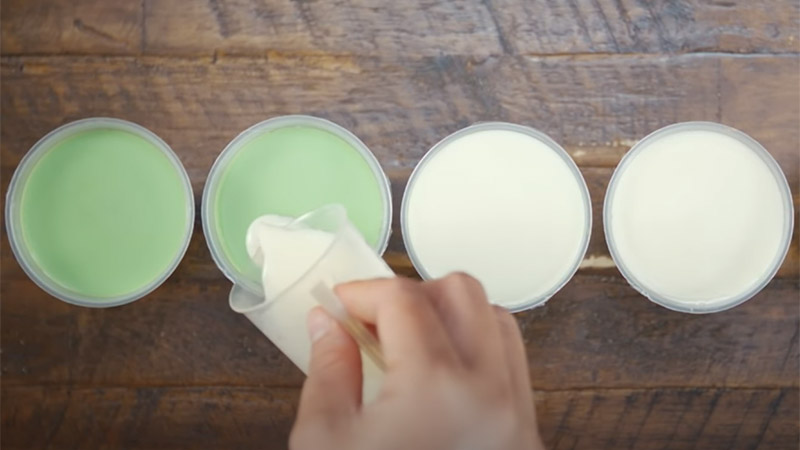
Step 3 Coloring the jelly topping
You add about 1 drop of food coloring to each cup of jelly topping, gently stir to mix the color and mixture evenly.
Note
Depending on your preference, you can increase or decrease the amount of food coloring so that the topping has a darker or lighter color.
Coloring jelly topping Mixing color for jelly topping
Step 4 Decorate 3D Shapes
After 30 minutes, take out the jelly mold from the refrigerator to pump flowers. Use a syringe with a designer needle or a medical needle to get an adequate amount of jelly topping. Next, pin the base of the jelly, about 1cm from the bottom, and shape it.
Depending on your preferences, you can create different shapes with different colors..

3D Shape Decoration
Step 5 Pour 2 layers of topping (aka base)
After decorating, pour the last 2 layers of topping to coat the surface of the base just formed, wait for it to cool, then put the finished jelly mold in the refrigerator for about 30 minutes. Then you can separate the jelly from the mold, put it on a plate and enjoy.
Pour the last 2 layers of jelly topping
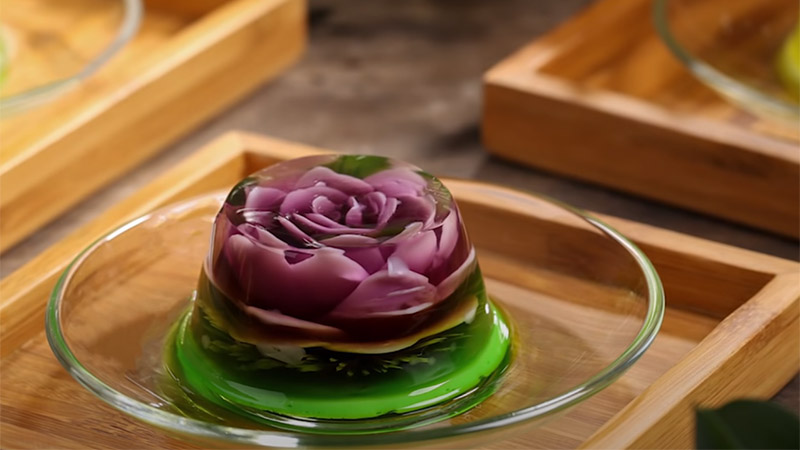
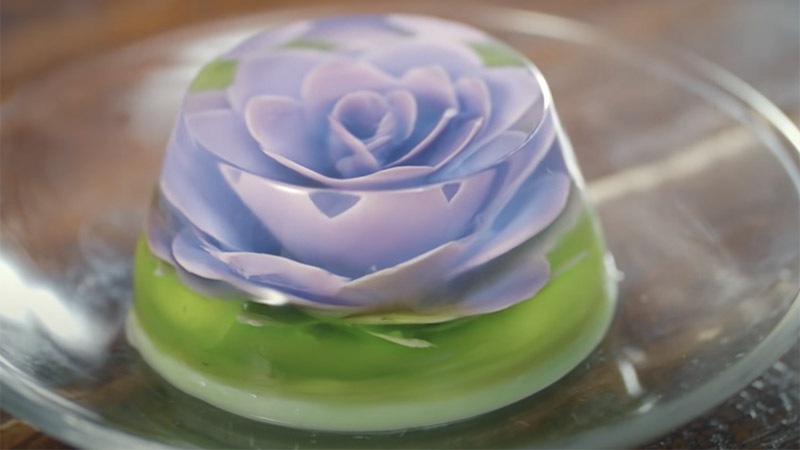
3.Finished product
The 3D jelly is beautifully decorated, the colors are harmonious and playful. Sweet and juicy jelly mixed with a little bit of soft fat of full-fat milk cream. The jelly will taste better when refrigerated.
With just a few simple steps, you can complete this beautiful dish. Wish you success with the artistic 3D jelly to treat your relatives and friends!
Source: Collector.
![]()

![]()